Scale Modes allow users to apply scaling preferences to visuals and slicers, indicating what should happen when you make more or less space available for the visual on the canvas either at design time or at runtime. Note: Each visual is contained within a bounding box which scales with the available space; scaling modes allow you to set the scaling behavior for the visual inside the bounding box.
This functionality enables scaling up and down when changing the available space:
- At design time; for example, when you customize the workspace, zoom in and out of the view, and so on.
- At runtime; for example, when you change the size of the browser window, or view the running presentation on a smaller or larger monitor.
By default, the Scale Down Only option is applied to all visuals. For more information, see Scale Down Only.
Tip: In addition to general scaling controlled by these features, it is also possible to enable or disable auto scaling on KPI Gauge labels. For more information, see Auto Fit Labels.
Change the Scale Mode
There are two ways to access the Scale Mode menu: from the Context Menu or from the Component ribbon.
Context Menu
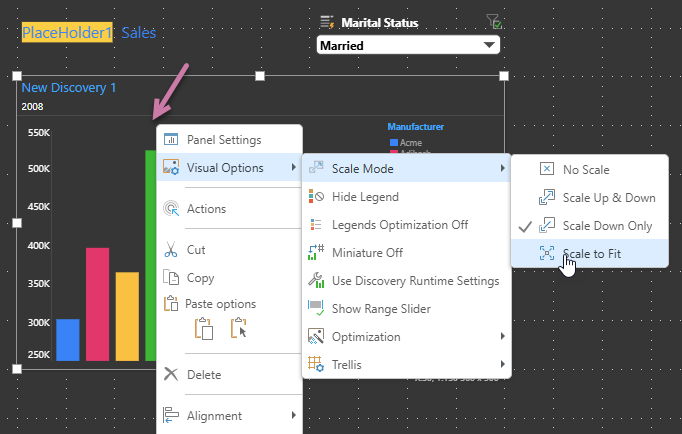
Right-click the visual or slicer and from the context menu select Visual Options > Scale Mode > <Scale Option>:
Component Ribbon
Select the visual on the canvas, go to the Component ribbon and choose Scale Mode > <Scale Option> from the dropdown list:

Scale Modes
No Scale
Choose No Scale if you don't want to apply any scaling to your visual. In this case, the visual will not be scaled up or down when the size of the canvas changes, but the bounding box still will. The visual's components (font, cells, segments, an so on) remain the same size, regardless of the size of the bounding box.
Note: If the visual is larger than the bounding box, only part of it will be visible. When launched at runtime, the bounding box may be large enough, in which case, the entire visual will be seen at runtime but not in edit mode.
In this example, we see that, as the slide is scaled up and down by moving the Formatting panel, the visuals are not scaled accordingly. Details like grid rows and columns are lost as the slide is scaled down. When the presentation is launched at runtime, we see more details, like more grid rows and columns, column chart labels on the x-axis, and more gauges in the gauge visual.
Scale Up & Down
Both the bounding box and the visual it contains will be scaled up when the slide size is increased, and down when the slide size is decreased.
In this example, we see that the visuals are scaled in proportion to the bounding box, regardless of the size of the slide.
Scale Down Only
The visual will be scaled down when the slide size is decreased, but will not be affected by increasing the slide size.
In this example, we see that the visuals are scaled down in proportion to the bounding box when the slide is scaled down, but when the slide is scaled up, the size of the visuals does not increase in proportion to the increase in the size of the bounding boxes.
Scale to Fit
The visual will be scaled to fit within the bounding box regardless of slide size. The bounding box is always scaled in proportion to the slide, so this option matches the visual scaling to that of the bounding box.
Note: Scale to Fit is not available for Slicers.
Here we see that the visuals are scaled to fit entirely within the bounding box, regardless of slide size. However, because of the large size of the grid, it can't be scaled down all the way because it contains too many items.